Display of Perk+ in your software
In August 2019, a new version of Perk+ was released by CSC/EzyStream. This version is optimised for mobile viewing and app embedding.
The embedded content provides to your app is designed to control branding based on point in the journey the user is at. Please ensure the following checklist is completed to comply with the guidelines of Frequent Values.
Checklist for embedding Perk+ in your app
- Get a URL for your user from our API.
- Embed the URL into your app using the Apple and Google embedded web content plugins.
- Ensure that the Perk+ website fills the screen in your app, less primary navigation. (This means that your own logo should be hidden. The embedded page will re-display your logo for you).
- Ensure that you have created interaction between your app local code and Javascript, to open external URLs as required by Perk+
- Connect the back button in Android devices to control your webview.
Displaying of Perk+ in your app
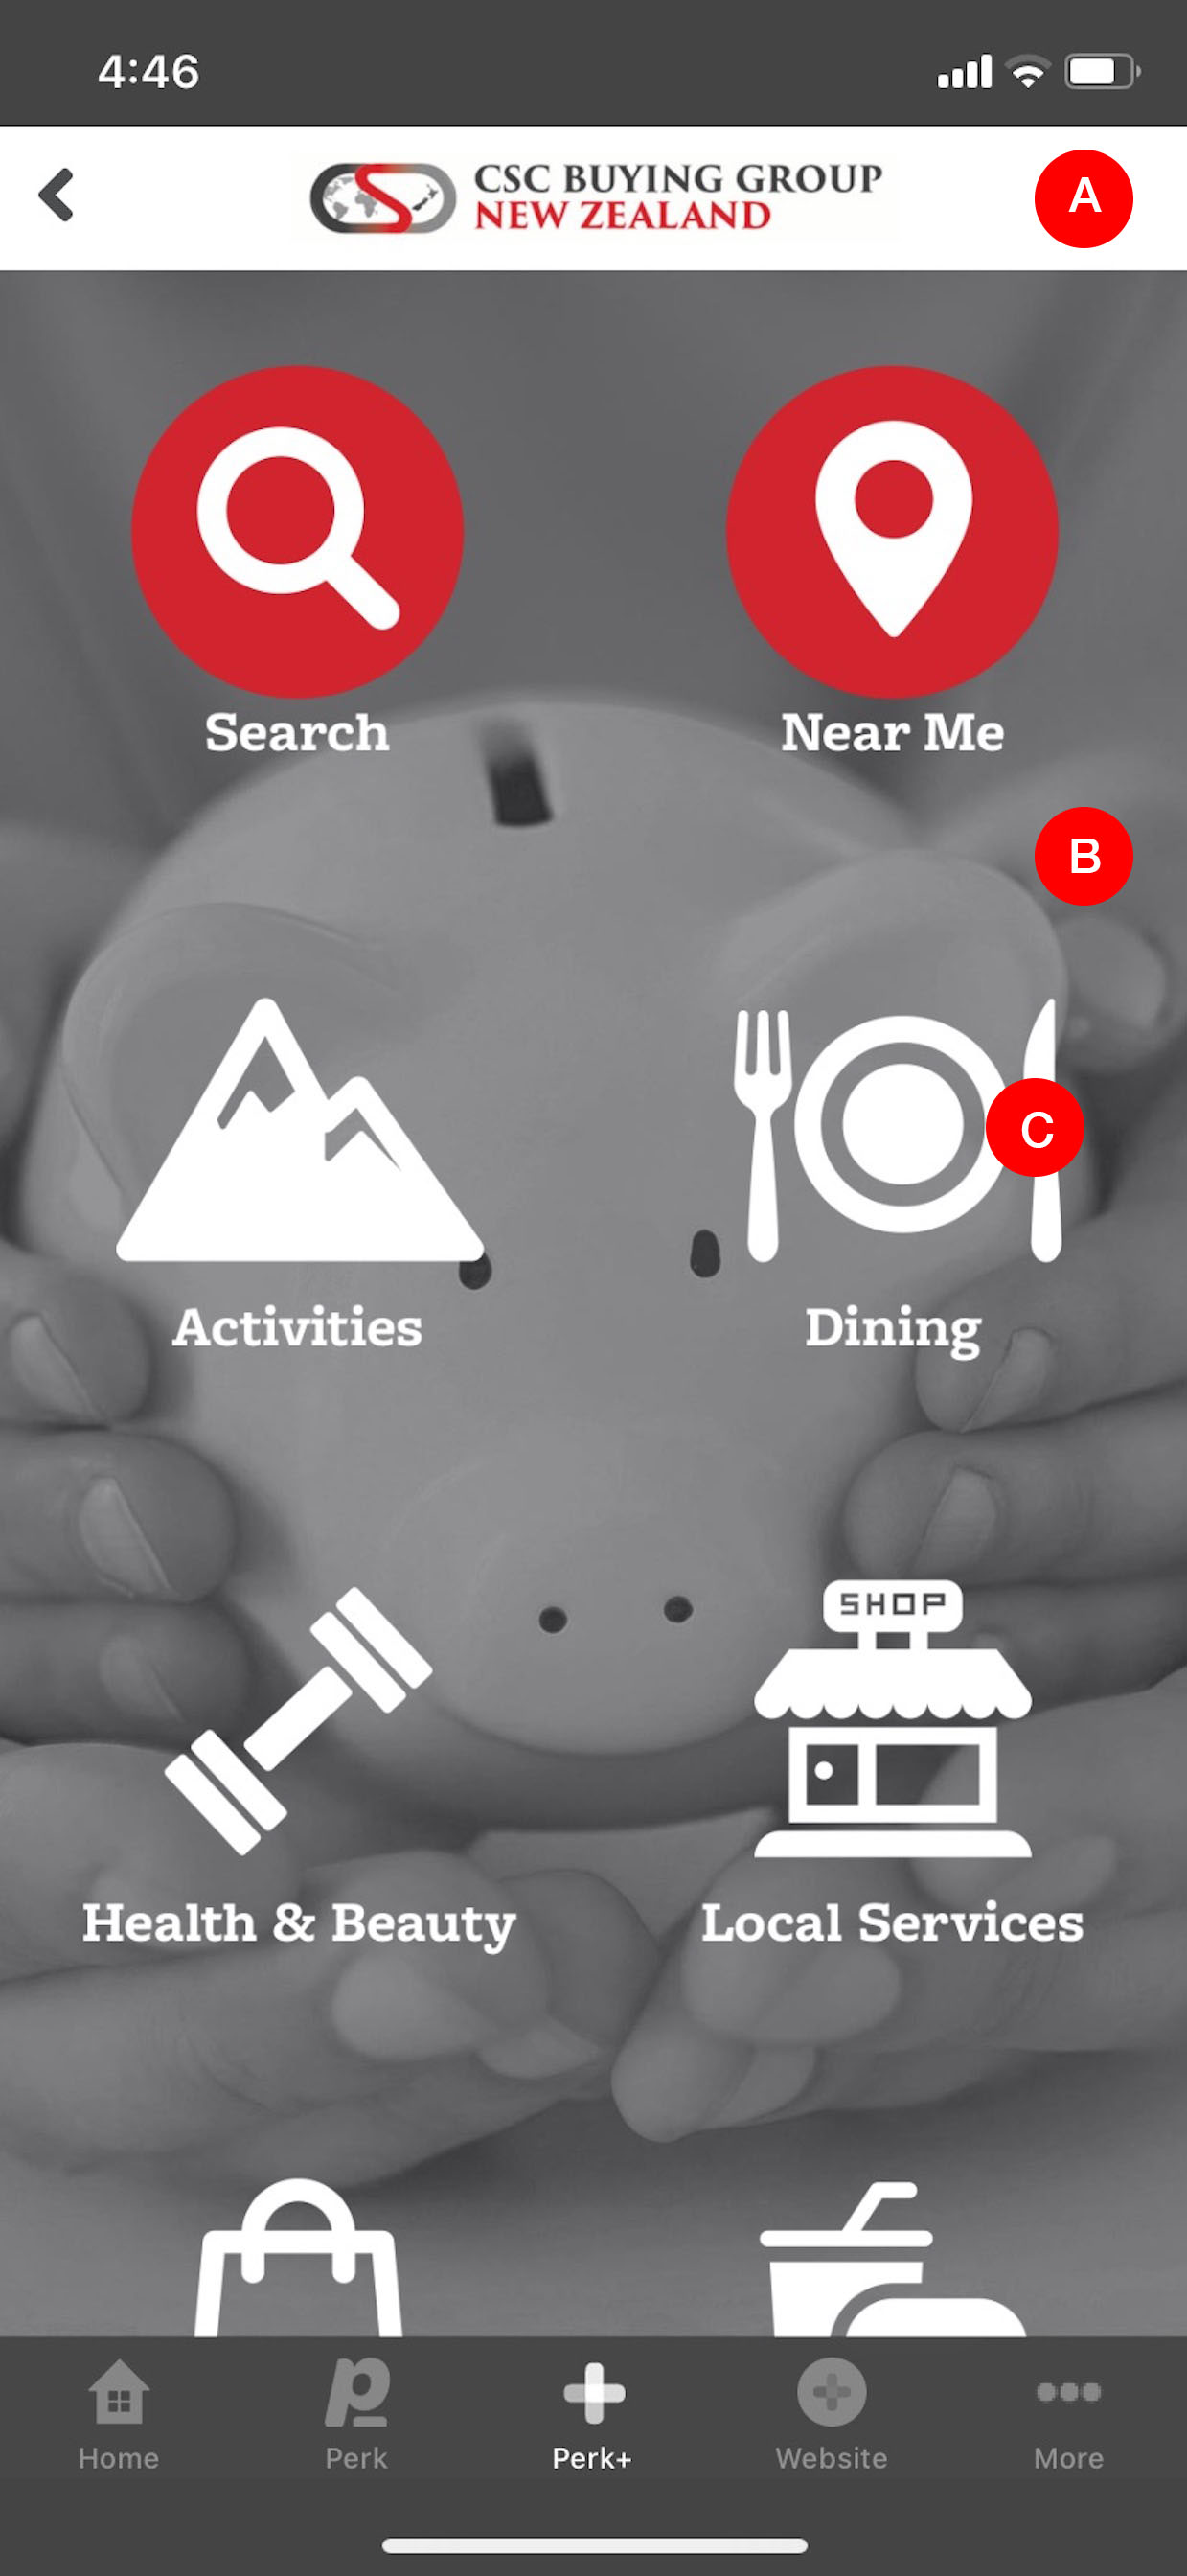
(A) Logo Block
This section is intended to replace your app header and provide back navigation within Perk+.
It is automatically hidden when a redemption is in process, to ensure that the retailer is displayed the correct branding for a successful redemption.
This logo will be your own logo and can be updated on the EzyStream dashboard. Logo specs can be seen here.
(B) Perk+ Page Background
The background of the Perk+ page can either be an image or a solid colour.
Please see our specs for how this image is displayed in mobile and tablet versions.
(C) Search/Near Me/Category Images
Each of these images can be customised to display your own images. This is changed in the EzyStream dashboard and should adhere to our specs.
App Navigation
The bottom navigation bar is recommended to be the only part of your app that remains visible while your user is using Perk+
Guest Mode
 .
. 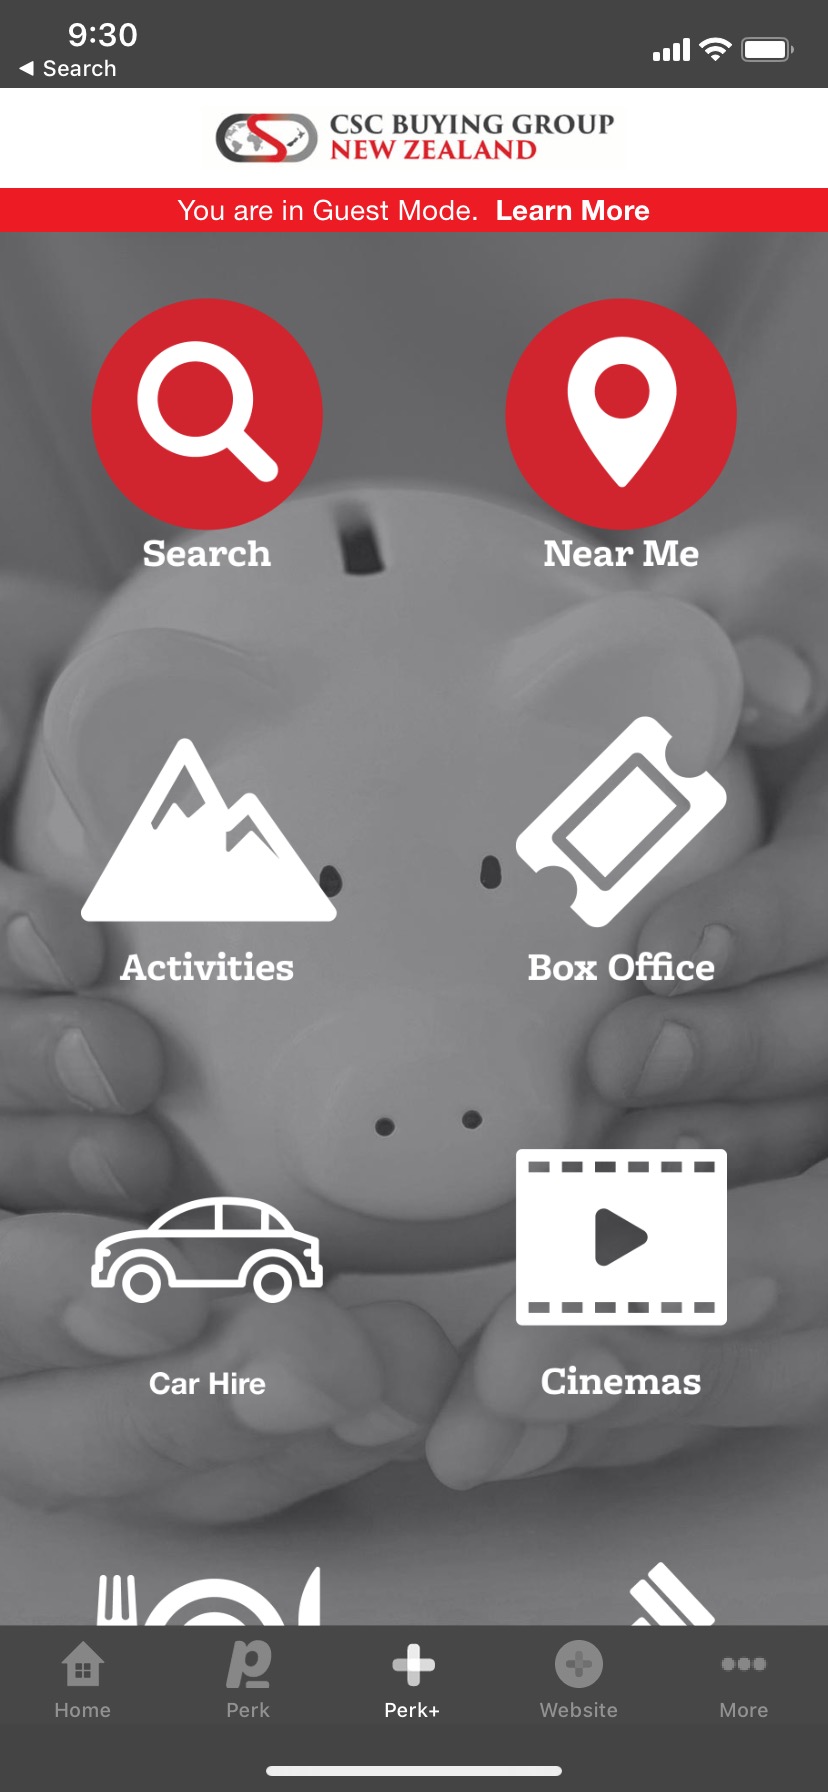
For a user to Access Perk+, they need both a valid membership number, and an Access Code allocated to their membership number. You can learn how to do that via the Membership API here.
If a user has a valid membership number (and are permitted to use your app), but you choose to use a model where members must pay to access Perk+, users can browse Perk+ in Guest Mode until their payment is made. This allows them to see an overview of discounts available before making a purchase.
To use Guest Mode, you should call the Perk+ API, with the member details as though they are a paid member. When EzyStream detects that no Access Code is available, Guest Mode will be displayed. If you grant access for the member via API while the user is still browsing, the next time the Perk+ client needs to check for a valid Access Code (by tapping on a discount), the Guest Mode banner will be automatically removed.
Interaction between your app local code and Perk+ Page Javascript
Perk+ provides two types of offers. When you click Redeem, some coupons open up a redeem screen within our interface. However, in some cases an external URL is provided, which is best to display in a web browser external to your app. ie. the User is transferred out of your app to a third party website where the customer can access their discount. This is recommended both for compliance with Apple and Google guidelines as well as preventing the requirement for support of external websites within your app.
To activate the external link, please review these implementation guidelines. Sample code is in C# for implementation in Xamarin.
Android
a. You must call this function to add the object name which will be used by JS in webpage.
webView.AddJavascriptInterface(this, "WebFragment");
b. Write a function to call external link in device.
[Export("OpenLocalBrowser")]
[JavascriptInterface]
public void OpenLocalBrowser(String url) {
Android.Net.Uri uri = Android.Net.Uri.Parse(url);
Intent intent = new Intent(Intent.ActionView, uri);
StartActivity(intent);
}
iOS
a. You should add a new protocol for the interactive.
[Protocol()]
interface IMyJSVisibleProtocol : IJSExport {
[Export("OpenLocalBrowser:")]
void OpenLocalBrowser(string url);
}
class MyJSExporter : NSObject, IMyJSVisibleProtocol {
public void OpenLocalBrowser(string url) {
BeginInvokeOnMainThread(() => {
UtilitiesIOS.redirectToBrowser(url); //a method to use iOS browser.
});
}
}
b. You have to add the property setting code.
[Export("webViewDidFinishLoad:")]
void WebViewDidFinishLoad(UIWebView webView) {
var context = (JSContext)webView.ValueForKeyPath((NSString)"documentView.webView.mainFrame.javaScriptContext");
context.ExceptionHandler = (JSContext context2, JSValue exception) =>
{
Console.WriteLine("JS exception: {0}", exception);
};
var myExporter = new MyJSExporter();
context.GlobalObject.SetProperty(myExporter, "WebFragment");
}
Struggling to find an answer to your question? Send us an email: help@ezystream.com